Getting Started
We’ll take you through the process of checking out the Wiimote anyway, using the free trial version, as briefly as possible.
Check the environment
To use the Wiimote Checker to check your Wiimote, you’ll need, at a minimum, the following
- A computer with Windows 10 installed
- Bluetooth Adapter
- Wiimote Checker(Free Trial Version)
- Wiimote
About Bluetooth Adapter
Make sure that the computer you are trying out has Bluetooth capability.
If you don’t know, do you have this symbol?
![]()
Wiimote checker uses the standard driver for Windows10.
Right-click on the Start menu to open the Device Manager and check your drivers.
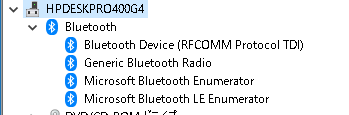
As long as “Generic Bluetooth Radio” and “Microsoft Bluetooth Enumerator” are set up as described above, you’re good to go.
Please contact the adapter manufacturer to find out if the standard driver is available and how to set it up.
Install Free Trial
Please click here to install it.The free trial is valid for 7 days.
Launch Wiimote Checker
Once installed, launch it immediately. The following window will appear.
![]()
This window is called the Wiimote Connector, and it manages Bluetooth connection and selects the Wiimote.
The settings button on the right side of the menu will take you to the manual page.
Pairing Wiimote
So, let’s connect the Wiimote.
Insert the batteries into the Wiimote and press the red Sync button – the LED is now flashing, right?
So, quickly click the “Add New” button
![]()
in the menu of the Wiimote Connector.
Pairing takes a bit of time, so wait.It will take 1 or 2 seconds to pair, usually 5-10 seconds.If it is cancelled after 30 seconds, repeat the process again.
If the LED light on the Wiimote goes out during the pairing process, press the red Sync button again.
When the Windows system dialog asks you to confirm the pairing, press “OK”.
If the pairing fails
See the “Wii Remote Pairing Fails” section of the FAQ.
Pairing establishment
Once the Wii Remote pairing is established, an icon

will appear in the Wiimote Connector window.
Click on this pairing icon to select it.
Open Wiimote View
Now, let’s open a window that displays information about the wiimote. With the pairing icon selected, click the Open View button
![]()
in the menu to open the Wiimote view.
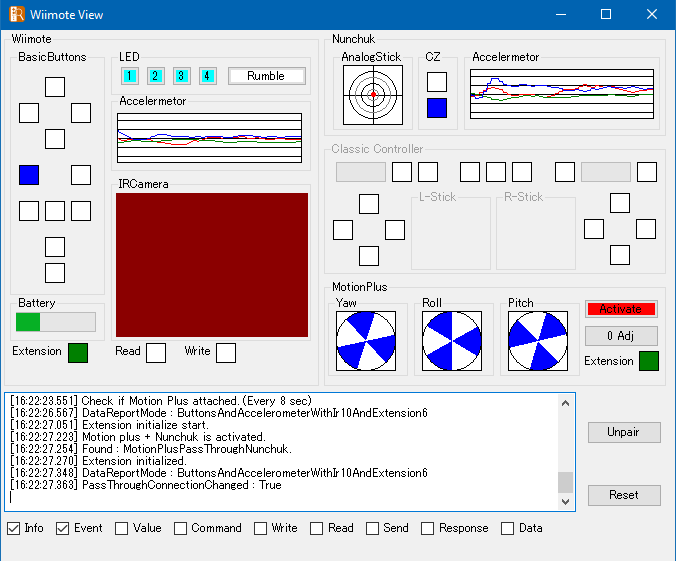
The current status of the Wiimote will be displayed, so please operate the Wiimote in various ways to see how the display changes.
Please see manual for more information on the screen.
Unpairing Wiimote
After checking the operation, unpair the Wiimote. If you do not de-pair, the information on the Wiimote will continue to remain on your computer.
Press the button
![]()
in the bottom right corner of the Wiimote View to switch to the Wiimote Connector and start unpairing.
When the Windows system dialog asks you to confirm the unpairing, press “OK”.
Soon, all of the LEDs on the Wiimote should also be turned off.
This completes the series of operations.